

Learning how to make vegan pizza at home is one of the most fun and satisfying cooking activities you can get yourself into… and it’s way easier than you think! It’s also a great way to get the kids involved in the kitchen and to start giving them some responsibilities for making their own cooking decisions. Above everything, making your own vegan pizza is about finding out that restaurant staples can be even better – in every way – when you make them at home.
Don’t miss my Homemade Vegan Pizza workshop!
Even the worst cook doesn’t need to buy ready-made pizza dough
Making your own pizza dough costs pennies, takes less than 5 minutes, and saves you from the plastic packaging that comes with the store-bought type.
Plus, it will give you a dopamine boost from having achieved something awesome all by yourself.
As you craft your own pizza regularly, you may even develop the joy of honing your dough-stretching technique. I’ll never get to 10,000 hours of practice in this art myself, but my skills have improved fabulously over the years, as have the texture of my crusts.
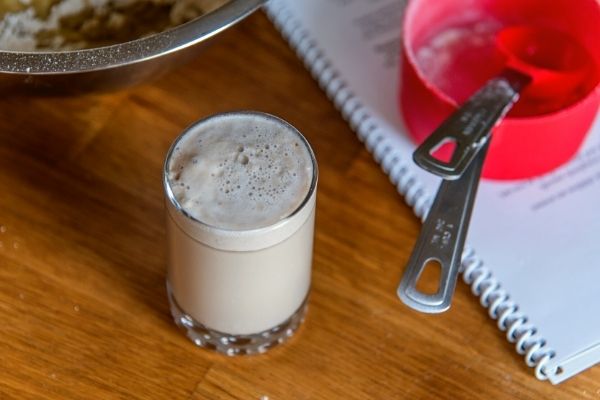
Step 1: Proof your yeast
Your kids will love this. Add 1 cup of hot water that’s about 100 degrees Fahrenheit (40 degrees Celcius) to a big cup. Add 2 teaspoons active dry yeast (or one of those small envelopes) and 1 teaspoon sugar to the water and stir to dissolve the sugar.
Tip: The water temperature is about the same as a baby bottle (or not-too-hot hot tub). On your wrist, it should feel warmer than your body’s temperature, but not so hot that it would burn a precious infant’s lips (or bum). If your plumbing and hot water tank are recent, it’s probably fine to get the hot water from the tap. Otherwise, use cold tap water and warm it up in a kettle or pot.
Now tell your kids this: the warm water will gently wake the yeast up, prompting it to eat the sugar and fart little bubbles of carbon dioxide. Cute, no?
Give the yeast time to stir, about 5 to 10 minutes. If after that much time you don’t have a nice frothy layer of bubbles, you have a problem. Either you killed the yeast with water that’s too hot, or it’s drowning in too-cold water, or it’s too old to fart. 😆 Fix the problem and start over.
If you make pizza every week, you don’t have to repeat the proof test every time. Just keep your jar of yeast in the fridge to ensure freshness. If you are at least 8 hours away from dinner, you can even use cold water.
Step 2: Mix everything together
This is where things get ugly (in a good way). In one big metal bowl, combine 3 cups of flour with the yeast-water-sugar mixture. Add 1/4 cup extra water, 1/2 teaspoon salt and a tablespoon of olive oil if desired.
Mix it all up, like so:
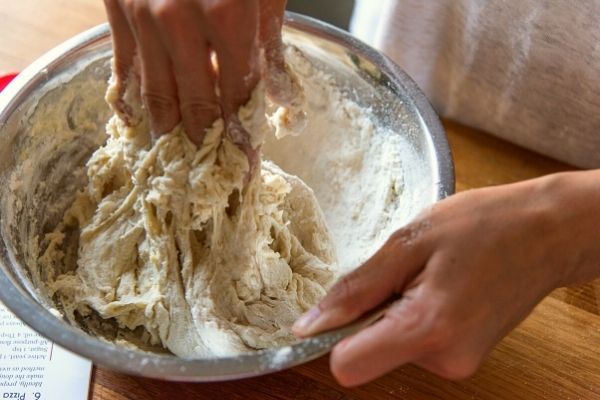
If you have a stand mixer with a dough hook, let it do the messy work for a minute or two.
If you don’t, do your best with a strong wooden spoon for a minute or two, trying to moisten as much of the flour as possible.
A word on the flour: It’s really hard to make a nice fluffly pizza with whole wheat flour only. I get the best results with all-purpose flour, and I can integrate whole wheat for up to 1/3 of the total flour weight… but it’s not as satisfying. That’s why we have pizza a couple times per month, not every day.
Step 3: Wait
Your options here are broad.
If you plan on eating pizza in the next couple of days, but not tonight, just cover the bowl with plastic wrap and put it in the fridge, ugly as it is. Nobody’s looking.
If you plan on eating pizza in the next 4 hours, cover the bowl with a wet (not dripping) towel and stash it in the oven with the light on (but no heat). Or maybe next to a sunny window.
If you plan on eating pizza in the next 4-8 hours, leaving it, covered, on the countertop is probably good enough.
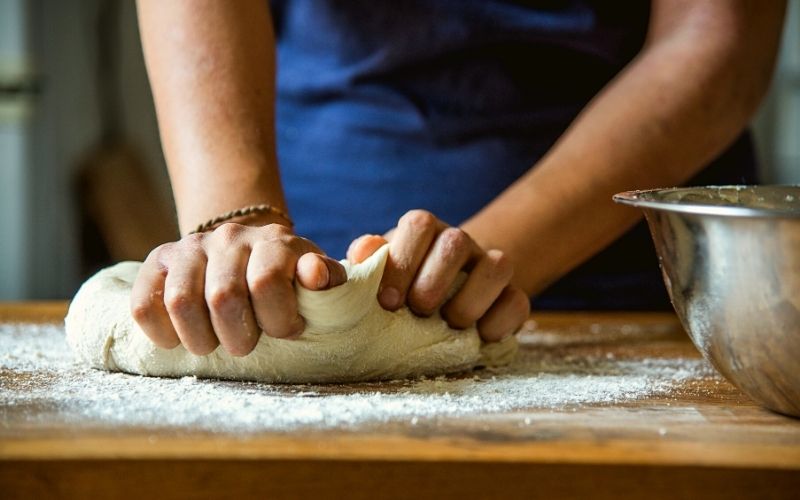
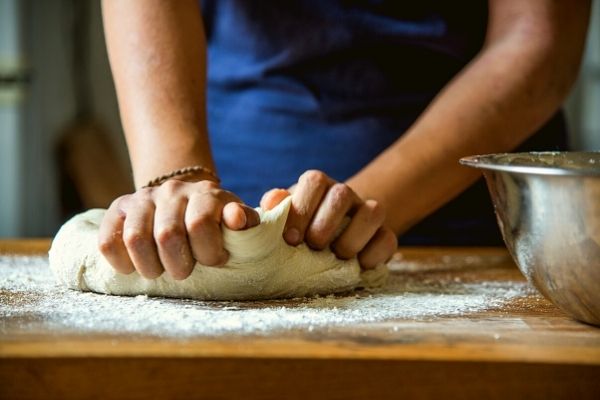
Step 4: Knead a bit
Dump your dough out of the bowl and knead it a bit to bring it all together into a pretty ball.
If you have a stand mixer with a dough hook, pop it back in there for another 2 minutes. Otherwise, knead for 4-5 minutes by hand, using your body weight to avoid straining your wrists.
Step 5: Wait some more (if you can)
If you have time, you can put the pizza dough back in the lit (but not hot) oven for up to 2 hours, covered. It will get plump again, giving you the opportunity to deflate it with a satisfying punch before stretching. But this step is not absolutely necessary.
Pro tip: add a teaspoon of oil to your bowl and spread it with your fingers before adding the ball of dough back in. It will save you a bit of scraping later.
Advanced prepper tip
Double up on all ingredients, and when you reach this stage split the dough in half. Wrap the half you don’t need tightly, using plastic wrap and a zip-top bag. Freeze for up to 6 months. You can freeze in smaller portions so it thaws faster, too.
Step 6: Stretch
Now is the time to fire up the oven – just make sure it’s empty first! Go as hot as it will, around 450 to 500 degrees Fahrenheit.
If you have a pizza stone, put it in the oven to heat it up for 20 minutes or more.
Sprinkle your work surface with a flour and keep about 1/4 cup extra in case you need it.
Divide your dough into two pieces (or more if making mini pizzas) and use your hands, assisted by gravity, to stretch into something like a circle.
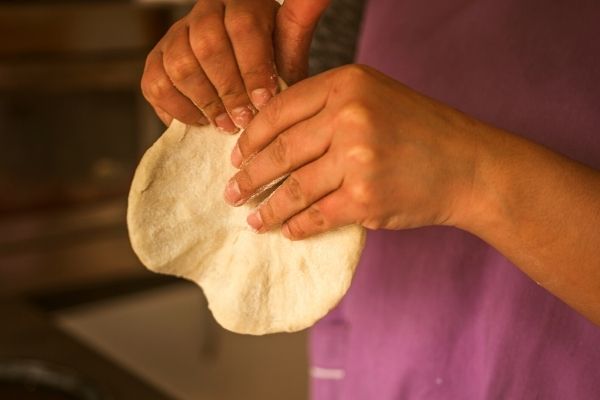
Work by hand as much as you can, but don’t beat yourself up if you need to pull out a rolling pin.
Advanced pizza-makers only: Once you have the basic pizza-making steps down, you can refine your dough-stretching technique by following the steps in this excellent video. Cheese is visible in this video from a definitely non-vegan chef, but so is the best and clearest demonstration of the proper technique for stretching pizza dough I have ever seen. (Don’t you love how he emphasizes the relationship between human and dough?)
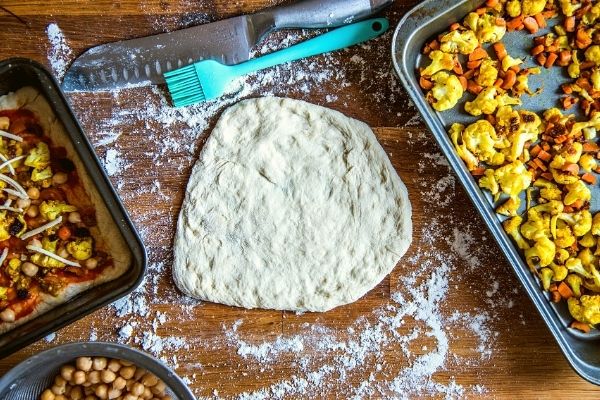
Step 7: Garnish
If you are using a pizza stone, but don’t have a pizza peel, I recommend transferring your stretched dough onto a sheet of parchment paper that will fit your stone nicely.
If using a pan (round or not, does’t matter!), I recommend oiling it first by spreading a teaspoon of oil or two on the bottom, using your fingers or a brush. It will make removal easier. Alternatively, a generous sprinkle of cornmeal will help with removal.
Don’t let technicalities stop you. My pizza ain’t completely round, and my pan ain’t made for a pie, but I still enjoy delicious pizza.
Now put your favorite toppings on the pizza. Like so:
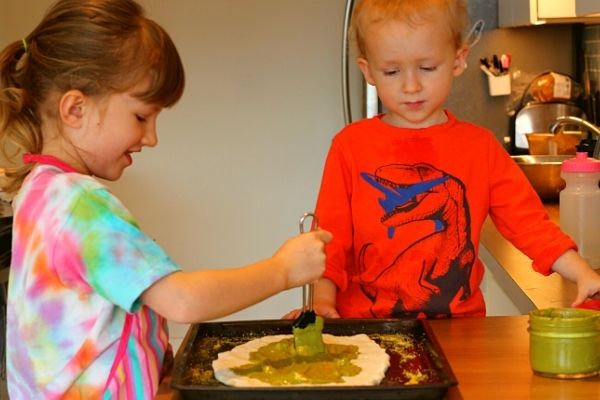
They fight for the opportunity to paint the pizza green, but neither will eat the pesto pie. More for me!
Start with a layer of tomato sauce, pesto, hummus, nutty sauce, or anything saucy, really.
Then add your favorite toppings. Here are some ideas:
- Chunky walnut pesto, thinly sliced potatoes (softened in salted water for 30 minutes), and a sprinkle of chili peppers (add slices of vegan sausage for hungry t-rexes)
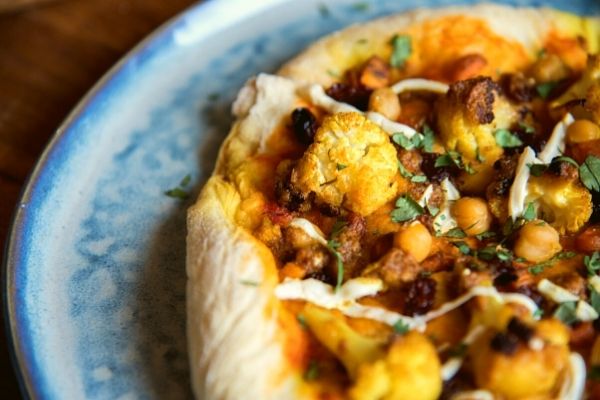
- Roasted cauliflower, carrots, and chickpeas with tomato sauce and a drizzle of cashew cream (perfect follow-up meal from the Warming couscous)
- Roasted mushrooms and red peppers with a sprinkle of corn kernels and baby arugula thrown on top as soon as it comes out of the oven (the arugula will wilt immediately)
- Artichoke hearts over a layer of kalamata olive tapenade, sprinkled with lots of vegan feta
- Black beans and onions sautéed together with a bit of adobo pepper then puréed, dropped onto a base of tomato sauce and sprinkled with diced onions and green olives, with a drizzle of cheesy sauce or vegan jack-style shreds – sprinkle with sliced green onions when it comes out of the oven
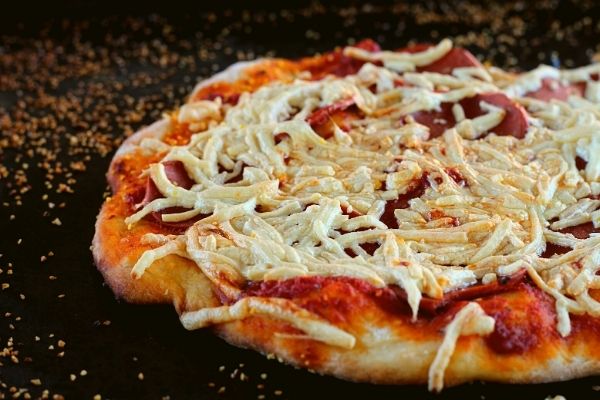
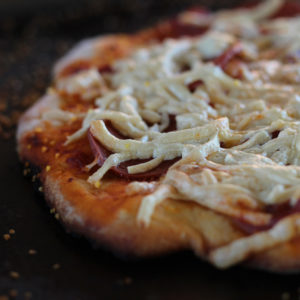
- Good ol’ vegan pepperoni and cheeze (my kids’ favorite)

My kids keep things simple: vegan pepperoni (by Yves) and cheesy shreds.
Step 8: Bake
Time to pop that pizza in the oven! Different toppings will need different timing, but generally you should start keeping a close eye on it after 10 minutes. It should certainly not take more than 20 minutes for the crust to be kissed with golden brown spots.
Carefully remove the pizza from the oven and let it rest for 2-3 minutes before slicing.
Dinner leftovers as vegan pizza toppings
Once you know the trick, making pizza dough is so easy, you’ll need to find new excuses to make vegan pizza more often.
Thursday night, when you survey the fridge for leftovers, make note of what would work well as a pizza topping. Be creative! Any cooked vegetable, legume, or vegan meat can be combined with a few flavor bombs (olives, spicy sauces, kimchi, chutney, etc.) to garnish your pie.
Before going to bed, mix the dough ingredients and pop them in the fridge.
Come Friday or Saturday night, you get to relax as you stretch your dough into shape, perhaps with a fancy beverage.
Practice integrating pizza into your weekly vegan meal prep
Pizza doesn’t have to be the stuff of special occasions only! If you meal prep on Sunday, you can take 5 minutes to mix your dough, let it ferment in the fridge for 2-3 days, and quickly stretch and garnish it while the oven preheats on a weeknight. It will feel like a treat! Yet it’s so simple.

Love the idea of an easy weeknight pizza? Make sure to download Planned & Plant-based for a carefully planned selection of vegan dinner recipes – including pizza! – that you can prep on the weekend and enjoy throughout the week.
Basic pizza
Ingredients
- 1 teaspoon olive oil (or non-stick spray) for the bowl
- 3 cups all-purpose flour you can sub up to 1/2 cup whole wheat flour
- 2 teaspoons active dry yeast
- 1 1/4 cups water cold is ok if fermenting over at least 8 hours, otherwise use warm water - see tips above
- 1 1/2 teaspoons sea salt
Instructions
- At least 6 hours (and up to 24 hours) ahead, oil a large mixing bowl lightly (or use non-stick spray). Mix the flour, active dry yeast and salt at the bottom of the bowl. Slowly add the water and stir until all the flour is wet. It will look like an unappealing blob, that's okay.
- Soak a clean tea towel under running water. Wring really well so there are no more drips. Use the wrung towel to cover the bowl containing the dough.
- Leave the dough to rise on the kitchen counter for at least 6 hours. Up to 24 is great. If it's really cold in your kitchen, you can put the dough in the oven with the light on (but make sure not to turn on the element!!)
- When you are ready to make the pizza, preheat the oven to 450 degrees F. Prepare your baking sheets by gently oiling and dusting with corn meal, unless you completely trust the non-stickiness of your pizza ware.
- Dust your clean kitchen counter with a generous amount of flour. Dump the dough and kneed it for about 2 minutes, just enough to integrate all the weird-looking bits into a smooth-looking dough. It doesn't need to be perfect.
- Break the dough into two balls. I find each ball to cover a 11X17-inch baking sheet well. You can make more smaller pizzas if desired.
- Stretch the dough with your hands and use a rolling pin if desired. Transfer to the baking sheet and adjust with your fingers. It doesn't need to be perfect!
- Add your favorite toppings on the stretched pizza dough. Start with something saucy like tomato sauce or pesto, or even a thick, cheesy white sauce. Finish with a dusting of sea salt flakes and fresh ground pepper.
- Bake in the oven for 15-20 minutes, or until the crust and toppings has lots of golden bits. If using two racks, consider swapping the pizzas partway through cooking.
- Let the pizza rest for 5 minutes before slicing. Enjoy!