

Soup is part of the solution to every problem worth solving in the world: hunger, of course, but also sickness, loneliness, anxiety, conflict, income inequality, fiber and vitamin deficiencies, and animal agriculture (among others). And the best thing about it is that even the absolute beginners can learn how to make vegan soup and get a decent bowl of plant-based goodness on the table in minutes.
In this post, I will teach you how to make vegan soup. At the time of publishing this, a Google search for the phrase “vegan soup recipe” returns an astonishing 947,000 results… which is ironic because the best soups are those you’ll make without a recipe.
By best, I do mean tasty, but not only that: nutritious, economical, satisfying, practical, and warm, too.
There are some basic principles that apply to every type of soup you can possibly want to make, and I will teach you those here, along with how to make vegan soup using your favorite kitchen appliances. But, first, why make soup?
Twelve reasons to cook more soup
- Soup transports all the veggies into your tummy.
- It’s a great way to use leftover or imperfect produce (raw or cooked).
- And perfect to integrate more greens and cruciferous veggies in your diet as well as healthful spices and herbs.
- Soup is easy to make even for absolute vegan cooking beginners.
- Adding whole grains and legumes to your veggie soup makes a complete meal in a single pot. Fewer dishes!
- You can set it and forget it (see slow cooker and Instant Pot methods below).
- All the nutrients stay in the cooking water, and some (like carrots) even release their nutrients better when cooked.
- Soup is perfect for lunches: easy to reheat in the microwave or carry in a hot Thermos.
- It freezes and thaws without a hitch.
- You can even dehydrate it and bring it camping (or pack it in your emergency preparedness bin).
- It makes your home smell good and your heart feel warm.
- Soup is easy to share with others hungry souls.
Two soups a week, that’s the minimum!
Soup 1: Every meal prep session, even the most minimal, should include a soup. It’s quick and easy to make a big pot of your favorite and eat it throughout the week as an appetizer or side to other meals, or on its own. Make soup every Sunday, refrigerate the fruit of your labor, and you’ll never be without anything to eat throughout the week.
Soup 2: Even better, add a soup to your weekday dinner plan. Most Vegan Family Meal Plans include soup, usually served with a hearty side salad or grilled sandwiches. For convenience, I often suggest that the soups be made in the slow cooker, because it allows to do the chopping at one time and the eating at another. Coming home to the aromas of a simmering soup is a great weeknight boon in the middle of a stressful week!
Take the Planned & Plant-based Challenge to enjoy my Rustic Bean Soup recipe and four more delicious dinners.
Types of vegan soup: chunky, creamy, and noodly
Soups can be served with visible pieces of their components (beefy barley and seitan soup) or look like a smooth, creamy, and homogeneous mixture (bisque of roasted red pepper)… or a mix of both (cream of mushroom).
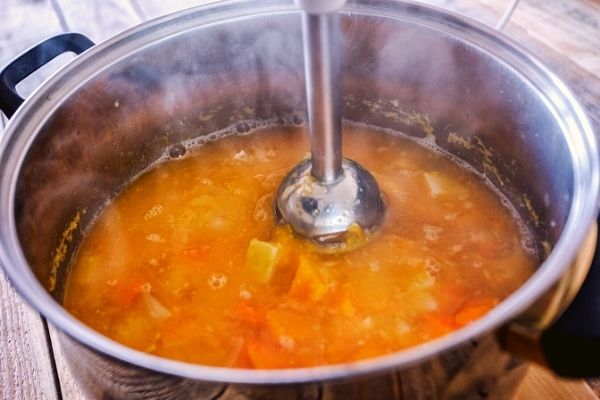
Traditionally, many soups are thickened by using either a starch (like flour or cornstarch) or heavy dairy cream. Although “vegan cream” is commercially available, I personally see no point in either of those techniques because they contribute little to no nutritional benefits, while adding refined and/or fatty ingredients. I prefer to simply blend my soup to the desired consistency using a hand-held “stick” blender or by carefully transferring it into my high-power blender (Vitamix) for extra-smooth results. If the soup is too thin, then next time I’ll know to add more lentils, vegetables, or grains, or less liquid. If the soup is too thick, it’s never too late to add hot vegetable broth.
Although I am certainly grateful for China’s invention of paper, my favorite Asian cultural importation is by far the noodle soup as a main dish. My mind and tummy were blown when I discovered Vietnamese phở in my teenage years and real Japanese ramen – not the dehydrated stuff in plastic packages! – in my 30s. I still don’t know why they feel so satisfying, but I think it might have to do with the pleasure of a diversity of mouthfeels thanks to the different components in the soup, combined in a single bowl along with the whole-body warmth imparted by the fragrant broth.
Basic stovetop vegan soup strategy
- Do you really need a fat to start? I think not, but if you are just getting started on a plant-based diet, you might want to use a teaspoon of olive oil or two as it will enhance all flavors. If going oil-free but worried about sticking, have a little broth at the ready and add a tablespoon of it at a time when things get too dry.
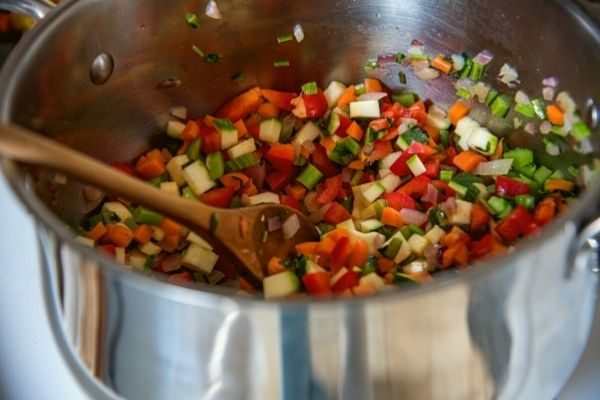
- Almost every soup benefits from getting a flavor jumpstart with the classic trio of onion, carrot, and celery (a.k.a. mirepoix in French and soffrito in Italian). Choose a good red onion (for extra phytonutrients), dice it, and cook it with a big pinch of salt for at least 5 minutes while you chop the carrots and celery. Then, add those and let them cook for another 5-10 minutes while you get the remaining ingredients ready.
- Use all part of dark leafy greens by detaching the leaves from the stems and chopping the latter finely, adding them at the same time as the celery. The leaves should go in at the end, as they will wilt quickly and retain the most nutrients.
- Denser vegetables and those cut into bigger chunks will take longer to cook, so add them right after the mirepoix. As the vegetables cook, their water content evaporates and flavors become more concentrated.
- It’s non-conventional, but I prefer to add garlic and ginger along with the spices, after the vegetables have cooked for a while. I find that it reduces the risk of burning them. I add them to the pot and stir for a minute to ensure that they make contact with the hot surface in the pot. After 30 seconds to 2 minutes, when I can smell them, I deglaze.
- Always deglaze. That means adding a small quantity (2 tablespoons to 1/2 cup) of cold liquid to your pot and letting it sizzle, energetically scraping the bottom with a flat wooden spatula at the same time to detach caramelized bits. Those are the sugars from the vegetables that you cooked, and they belong in your tummy, not at the bottom of the dirty dish water. (Bonus: deglazing also makes dishwashing quicker.) Great deglazing liquids include citrus juices, flavorful vinegars, wine, and vegetable broth. Water will do in a pinch. Pro tip: have your deglazing liquid ready before you add the garlic and spices.
- After deglazing, add the hot vegetable broth. I find it easier to use a quality broth powder, which I throw straight into the pot, and pour in boiling water from the kettle. You could always use cold water but then you’ll have to bring the soup back to a boil before simmering. If using canned tomatoes or coconut milk, now’s the best time to add them as well.
- Add other ingredients like beans, lentils, and/or grains (barley, rice, quinoa, amaranth, etc.). Do NOT add noodles now however. (They have to go in at the end, cooked separately.) Stir well to make sure there are no clumps.
- Simmer the soup for 20 minutes or until all ingredients are done to your liking.
- Add dark leafy green leaves as well as fresh herbs, if using, and maybe another squirt of lemon juice depending on the soup’s flavor profile.
- Taste and adjust seasoning. Keep in mind that ready-made broth is often salty, so you probably need less salt than you think.
- Blend if desired.
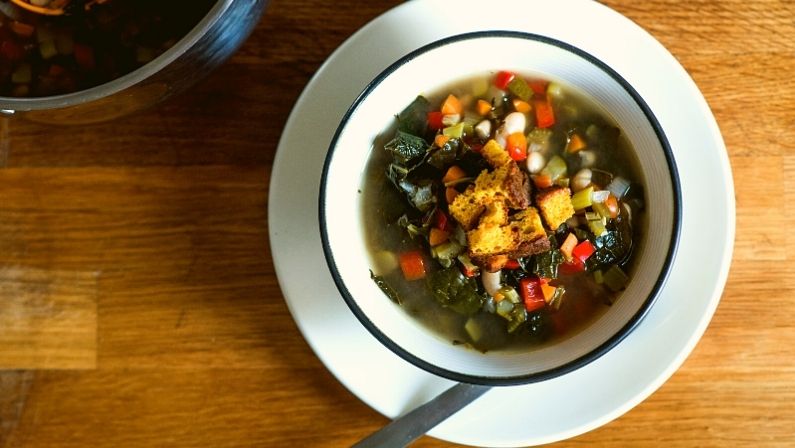
- Don’t forget the garnish! A little finishing touch (fresh herbs, a few pumpkin seeds, a sprinkle of parm nuts, or a spiral of nutty cream) will elevate your soup. Croutons cut out of a piece of toast add some crunch. A squirt of lime works well, too.
- Help yourself to a bowl while the soup cools enough to transfer to containers and refrigerate or freeze. (Don’t forget to label!)
NOODLE ALERT!
When making noodle soup, remember to cook the noodles separately, then drain and rinse with cold water to stop them from cooking into mush. Some, like rice noodles, just need to steep in super-hot water for a few minutes. To serve, place a handful of noodles in your bowl and ladle the hot soup on top. The noodles will warm up instantly.
More tips on how to make vegan soup taste great

Cook the noodles separately then add them to individual bowls before pouring in the hot soup.
To blend or not to blend? Just mix things up.
Some soups’ cultural baggage makes us want to blend them smooth (Vichyssoise), others scream for chunks (minestrone). But, rest assured, the soup police is not barge in if you depart from tradition.
Don’t think of blending as the secret weapon. Some picky eaters (children and adult alike) will prefer their soup blended smooth, which is a good opportunity for the cunning cook to sneak in extra nutrition. For example, red lentils completely break down during cooking and practically vanish when blending. Other selective eaters, however, are suspicious of mixtures when they cannot readily identify all ingredients. (Wise.)
A possible benefit of chunky soups is that they lead you to feel satisfied sooner and full for longer. I wouldn’t say that there is a broad scientific consensus, as only a few studies have been done on the topic, but it does make sense that having something to chew on keeps you on task for longer, giving your brain more time to get the stomach’s message: “Hey, I’m full now. Stop telling the hand to lift the spoon!” In addition, chunks require more effort to digest than a homogeneous pulverized liquid. On the flip side, blended soups may have more readily absorbable nutrients.
If you’re having two soups per week, just make one smooth and one chunky to edge your bets.
Noodly soup should never, ever be blended – that would be a sacrilege! Unless, naturally, the recipient has to eat it through a straw, in which case you might be better off using a whole grain anyway, such as quinoa, barley, millet, or amaranth, instead of a flour-based noodle.
Time-saving tip: If you plan on blending the soup, it means you can be sloppier with the chopping. Your vegetable chunks should still be roughly similar in size, but since everything will be blended smooth, no-one will notice that your garlic wasn’t perfectly minced. Just slice it.
The stoup variation
For bring-along lunches, I often prefer “stoup” to soup. That’s my unofficial name for a dish that’s halfway between a soup and a stew. It’s great to serve on top of cooked rice or scoop with a piece of bread. If you have a big appetite but only a small container, stoup also packs more calories per volume.
To achieve a stoup, you can either reduce the amount of broth or other liquids you put in, or simmer the soup for longer (so more water evaporates, concentrating the flavors).
Many soups will accidentally become stoups as they cool and thicken. To return them to soup, you may need to stir in a little broth or hot water.
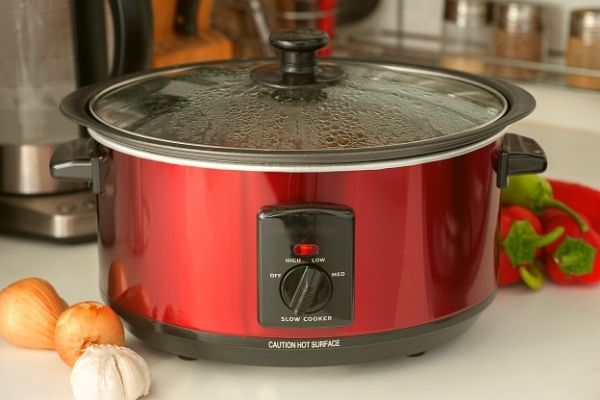
How to make vegan soup in the slow cooker
The easiest way to make vegan soup in the slow cooker is simply to put in all the ingredients into the crock and cook on low for 6-8 hours.
The downside is that slow cooking does not develop flavors in quite the same way as cooking on the stovetop, because the temperature that’s safe to maintain while you’re not looking (less than 200 degrees Fahrenheit) is lower than the temperature required for caramelization (around 300 degrees). To make up for this, you may feel the need to increase the amount of flavorings such as spices in your dish.
Slow cooking also requires less liquid (broth), because there is a lid on the crock, preventing evaporation. Using approximately 20% less liquid than you would for a stovetop recipe should do.
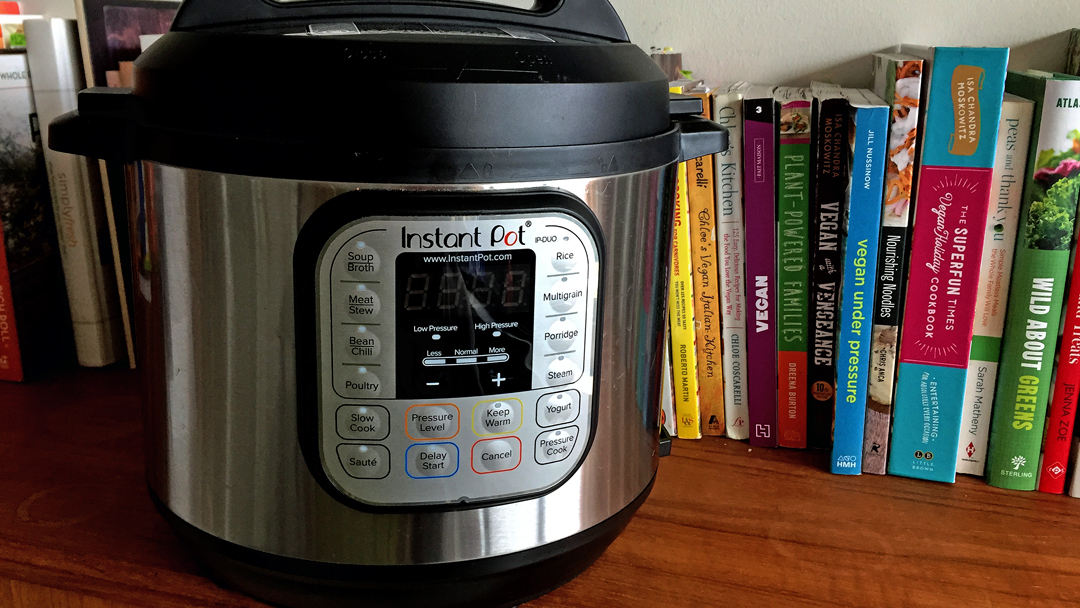
How to make vegan soup in the Instant Pot
The benefit of using an Instant Pot is that you can start cooking your vegetables on “sauté” mode, developing flavors as you would on the stovetop, then hit “cancel,” add the rest of the ingredients, and proceed to automatic high pressure cooking. You’ll want to set the timer based on the slowest-cooking ingredient.
Pressure cooking is not particularly faster than cooking on the stovetop, but if you are using an electric pressure cooker such as an Instant Pot, you can set it and forget it, as you would with a slow cooker.
Because pressure cooking is also done under cover, you will want to reduce the amount of liquid in your Instant Pot soup as well.
My blog post about converting recipes to be Instant Pot-friendly provides more information about that mode of cooking.
Vegan soup in the oven: why not?
If you have a full meal prep session on the go, you might want to make space on your stovetop. Get the soup started on the stovetop in an oven-safe pot with lid, deglaze, add the rest of the ingredients, then cover with an oven-safe lid and transfer to the oven at 300 degrees Fahrenheit and simmer for about an hour.
You could also simply put in all ingredients in an oven-safe dish such as a Dutch oven, cover, and “bake” for 2-3 hours in the oven, but that’s not very energy efficient. If you use this method, remember to carefully pull the soup out and stir it every hour or so.
An alternative approach is to chop the vegetables into big chunks, add to a Dutch oven, and toss with just a little olive oil. Roast at 375 degrees Fahrenheit (lid not needed) for 30-45 minutes, stirring once partway through. Then, bring the pot to the stovetop, add liquid ingredients, flavorings, and perhaps some beans, and simmer 20 minutes. Blend smooth and enjoy the sweet caramelized flavors! Perfect if you oven is already on for something else.
You can even make vegan soup in the blender!
High-power blenders’ blades spin so fast that they generate enough heat to actually cook your soup. Those who aren’t too bothered by loud noises can make a small batch of soup by adding a few vegetables, some liquid, and flavorings in the blender, gradually turning it on to high speed, and letting it spin for 5 minutes or until steaming. Don’t overfill the blender and proceed with caution as it’ll get quite hot. Few things ruin the day quite like beet soup that splashes all over your kitchen cabinets and ceiling.
How to make vegan soup in practice: my rustic bean soup
This simple, all-substitutions-allowed soup is part of my Planned & Plant-based challenge. Start from that example and, from there, see how many ingredients you can change to accommodate what’s in your pantry and your family’s favorite vegetables, and slurp away!
Rustic bean soup
Ingredients
- 1 red onion diced
- 1/2 bunch kale stems sliced finely, leaves chopped into ribbons
- 2 branches celery diced
- 3 carrots diced
- 1 zucchini diced
- 1 red pepper diced
- 3 cloves garlic minced
- 1 teaspoon thyme crushed between your fingers
- 1 teaspoon oregano
- 1/4 cup lemon juice
- 6 cups vegetable broth reconstituted from powder is fine
- 1 can cannellini (or Great Northern) beans drained and rinsed (or 1 1/2 cups cooked beans)
- 1/2 tsp salt optional
- fresh ground pepper to taste
Instructions
- In a large saucepan on medium heat, cook the onion and kale stem slices in 1 tsp olive oil with a generous pinch of salt for about 5 min, stirring occasionally.
- Add celery and carrots, cook 3 more min.
- Add zucchini and red pepper, cook 2 min.
- Add garlic, thyme, and oregano. Stir and cook 30 sec.
- Add lemon juice, scrape the bottom of the pan to detach caramelized bits.
- Add vegetable broth and cannellini beans, bring to a boil then reduce to an active simmer. Cook 15 min or until all the vegetables are tender.
- Taste and adjust seasoning, adding plenty of fresh pepper.
- Add the kale leaves and stir.